
Replacing a Standard Screen Wall With a Picture View
How a Picture View wall differs from a standard screen wall, what the change involves in Florida, and what to settle before you ask for an estimate.


The Short Answer
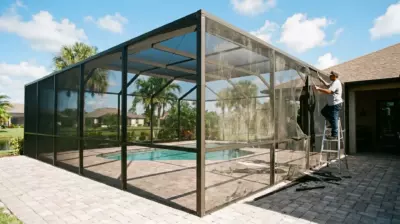
Standard Screen Wall vs. Picture View Wall
| Feature | Standard screen wall | Picture View wall |
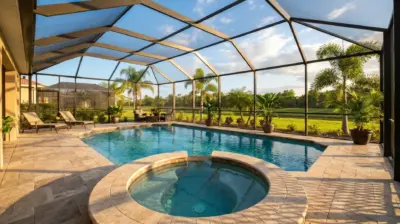
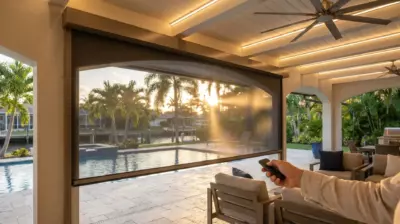
| What you see | Horizontal bars and posts divide the view into panels | A wide, open section with fewer interruptions |
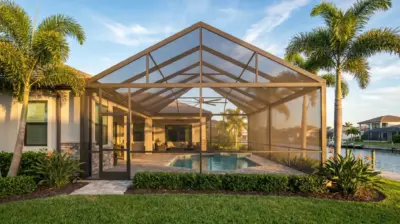
| Frame | Posts and horizontal members set at regular intervals | A reinforced frame designed for the wider opening, which may include cable bracing |
| Lower section | Often has a lower panel zone, for example pet screen or Florida Glass | Decided per project together with the opening |
| Engineering | Designed for the site | Designed for the site and for the wider opening |
| Best for | Walls where the view matters less, or where the bars are wanted | Water, garden, or pool views you want to see clearly |

When Replacing a Wall Makes Sense
- The wall faces water, a garden, or a golf course, and the horizontal bars cut the view into strips.
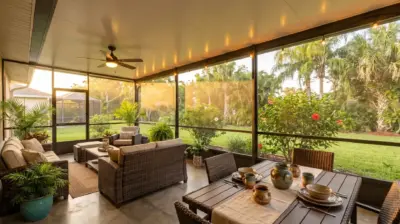
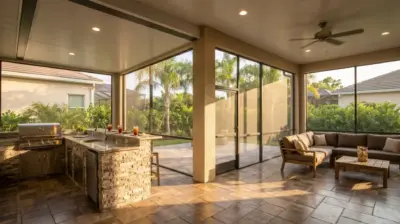
- The pool deck or patio is seen from the kitchen or living room, and this wall is what you look at most.
- You are already repairing or rescreening the cage and want to improve the wall at the same time.
- Family and guests spend a lot of time in the enclosure and you want it to feel more open.
- The existing frame is sound and can be reviewed by an engineer.
First, Know What Your Wall Is Made Of
Every screen enclosure is designed for its own site, so the first step is to learn what your wall carries today. If you are comparing it with other designs, the page on custom screen enclosures shows the kinds of enclosures Screen Factory Florida builds.
Know the Parts of the Wall

| Component | Why it matters |
| Vertical posts | Carry the wall and the roof edge. Heavier sections, such as square tube columns, may be used where the engineer requires them. |
| Horizontal bars | Divide the view in a standard wall. In some designs they also stiffen the wall, so the engineer decides which can go. |
| Beams and headers | Carry the roof load above the opening. Long spans use engineered beams. |
| Cable bracing | Diagonal reinforcement for walls and corners. It helps a wide opening resist wind movement. |
| Screen mesh and spline | The mesh sets clarity, airflow, and strength. The spline holds it in the profile. |
| Footing and anchors | The wall stands on reinforced concrete and is anchored into it. A new opening does not remove that need. |
| Fasteners | Stainless steel is used in load bearing and coastal connections. |
What to Decide Before You Request an Estimate
- Which wall or walls you want opened, and about how wide.
- What you want to see from inside, and from where you sit.
- Whether pets or small children use the space, and whether the lower part of the wall must stay solid or reinforced.
- Whether the afternoon sun hits the wall and you want glare control.
- Which mesh fits your priorities: clarity, small insects, or wind.
- Whether your HOA has rules about changes to the enclosure.
How the Replacement Works, Step by Step

1. Site Visit and Measurements
A specialist visits the home, measures the wall, and looks at the existing frame, the roofline, the footing, and the view you want to open. This is the moment to point out bent members, loose fasteners, or old repairs, because they affect what the engineer can approve.
2. Engineering Review of the Existing Frame
The engineer checks whether the frame can take the wider opening or needs reinforcement, for example heavier posts, a stronger beam, or added cable bracing. The result is a drawing that shows what stays, what changes, and what is added. Until that drawing exists, nobody should remove a member from the wall.
3. Design and 3D Preview
Screen Factory Florida prepares a 3D visualization so you can see how the opening will look from the pool deck or the kitchen window. This is the time to adjust the width of the opening, the finish, and the mesh, before anything is built.
4. Permit and HOA Approval
The company handles the permit application where the local building department requires one and coordinates with your HOA. Requirements differ by county and city, so ask for the rules for your address instead of assuming. Work starts after the approvals are in place.
5. Wall Rebuild
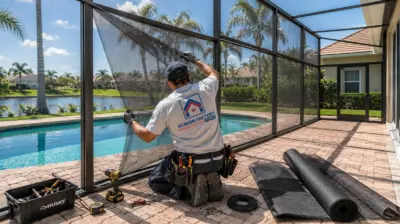
The crew removes the wall members shown on the plans, installs the reinforced frame, and fastens it with stainless steel hardware where the plans call for it. Where the design includes cable bracing, it is installed as part of this step. The work follows the approved drawing, not field improvisation.
6. New Mesh and Final Check
New mesh is installed in the opening and held in the profile with spline. The team checks the frame, the fasteners, the doors, and the mesh before the job is closed.
Choose Mesh for a Clear View

The Most Important Florida Rule: Let the Engineer Decide What Comes Out
Florida-Specific Considerations

Permits and HOA Rules
A structural change to an enclosure usually goes through a review, and many communities also require HOA approval before work starts. Confirm the rules for your address with the local building department or your contractor.
Sun and Glare
A wide opening gives the afternoon sun a clear path. If the wall faces west, discuss Charcoal Sunscreen on part of the wall so the space stays comfortable.
Salt Air and Coastal Homes
Near the coast, salt speeds up corrosion. Stainless steel fasteners in load bearing and coastal connections protect the wall, and an occasional rinse of the frame and mesh helps.
Wind and Storm Season
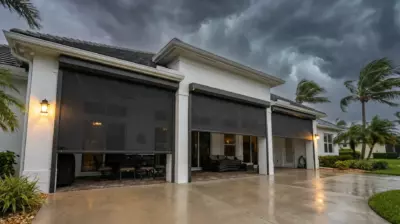
Cable bracing and a reinforced frame help a wide opening resist wind movement, but they do not make the wall storm proof. Before hurricane season, inspect the cables, the mesh, and the doors.
Pets and Lower Panels
Pet screen 14/10 is made for lower sections where animals touch the mesh. If pets use the space, ask the engineer and the installer how the lower part of the wall will be handled when the horizontal bars come out.
Common Mistakes When Changing a Wall
| Mistake | Why it causes trouble | Better approach |
| Cutting out a horizontal bar or post yourself | The member may stiffen the wall or carry load, and you cannot see that from outside | Ask for an engineered plan and let the crew follow it |
| Choosing the mesh by price only | Clarity, airflow, and wind strength differ between meshes | Choose by view, insects, sun, and wind exposure at your home |
| Skipping the permit or HOA approval | Work may have to be stopped or redone | Confirm the rules for your address before work starts |
| Expecting glass like clarity | It is still a screen, and the mesh is visible up close | Judge the view from where you sit, using the 3D preview |
| Ignoring pets and lower panels | Animals push on the lower part of the wall and can damage the mesh | Agree on the lower section with the engineer and installer |
When Professional Service Is the Right Call
A Pre-Estimate Checklist
- Photos of the wall from inside and outside.
- Approximate width and height of the wall.
- A note of what you want to see and from where.
- Where the afternoon sun hits the wall.
- Whether pets or small children use the space.
- Your HOA rules or approval requirements, if you have them.
- Any earlier plans or permit papers for the enclosure.