

A Homeowner’s Guide to Pool Screen Cages in Florida
What to check before you sign. The footing, the permit, and the mesh decide how long a pool screen cage lasts. Here is what to check in a quote and how to care for the cage afterward.


The Short Answer
A Pool Screen Cage Timeline: What Happens When
| When | What to do |
| Before you request a quote | Decide what the cage must cover: only the pool, or the deck, outdoor kitchen, and doors as well. |
| During design | Confirm the footprint, height, roof shape, frame color, screen mesh, number of doors, and gutter size. |
| Before construction | Make sure the engineering plans, the building permit, and any HOA approval are in place. |
| During installation | Confirm the footing is reinforced concrete and the columns are anchored into concrete, not into loose pavers. |
| Monthly | Look over the mesh, the doors, the gutter, and the screws; clear leaves from the gutter and the base of the walls. |
| Before hurricane season | Trim branches, secure patio furniture, check the doors and cables, and repair loose panels. |
| After a storm | Inspect the mesh, the frame, and the gutter before using the space; photograph any damage. |
First, Know What a Screen Cage Is and Is Not
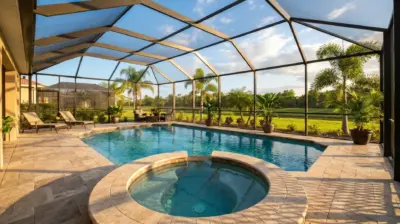
Know the Parts of a Pool Screen Cage
| Component | Why it matters |
| Concrete footing | Carries the frame and resists wind uplift. A pool cage usually stands on a reinforced concrete footing rather than on loose pavers. |
| Columns and beams | Square tubes form the columns; patio beams and larger SMB beams carry the roof. Larger spans need heavier beams and engineering. |
| Wall and roof profiles | Open back profiles form the walls; snap profiles hide the screws where a cleaner look matters. |
| Screen mesh and spline | The mesh keeps insects and debris out; the spline locks it into the profile. The spline size is matched to the profile. |
| Cable bracing | Steel cables with brackets stiffen large spans and corners and reduce movement under wind load. |
| Gutter and downspouts | Carry roof water away from the house and the cage. Long roof lines usually need a larger gutter. |

What to Decide Before You Request a Quote
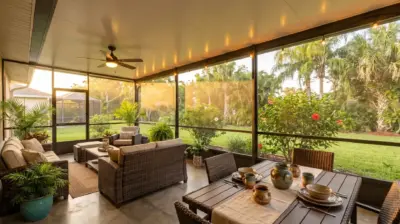
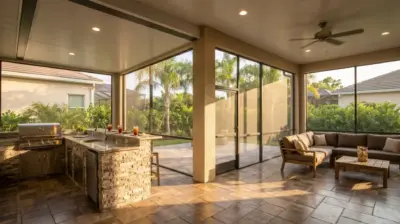
- The footprint: the pool only, or the whole deck with seating, a grill area, and the doors you use most.
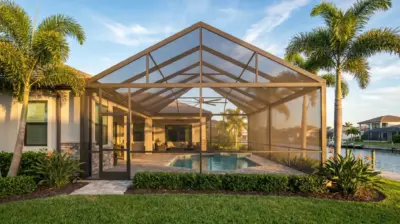
- The roof shape and height, and whether the cage should match the roofline of the house.
- The frame color; white and bronze are the standard finishes.
- The screen mesh for walls and roof, based on insects, pets, and how much view you want.
- The number and location of doors, and whether the doors need kick plates or pet doors.
- Whether your HOA has rules on color, height, or placement that must be met before the permit.
How a Pool Screen Cage Project Works Step by Step
1. Survey the Site
A specialist measures the pool deck and the back wall of the house, notes the roofline, the doors, the slope of the yard, and nearby trees. These measurements decide the footprint and show where water will run off the roof.
2. Choose the Shape, Roof, and Color
The roof shape, the height, and the frame color set the look of the cage. A cage that follows the lines and color of the house usually looks like part of the home rather than an addition.
3. Choose the Screen Mesh
Standard mesh suits most homes. Finer mesh helps where tiny biting insects are a problem, heavier mesh suits large panels and windy sites, and pet mesh protects the lower panels and doors. Many cages combine two or three types.
4. Engineer the Structure
An engineer sizes the beams, columns, cables, and anchors for the span and the wind exposure. The plans also show the footing and how the cage connects to the house. Larger cages and longer spans usually need heavier beams and more bracing.
5. Obtain the Permit and HOA Approval
In most Florida communities, a pool cage needs a building permit, and many neighborhoods also require HOA approval first. A contractor who prepares the site plan and engineering plans can submit a complete application and keep the schedule clear.

6. Prepare the Footing
The crew checks the existing concrete or pours a reinforced footing along the cage line. Where the deck is covered with pavers, the pavers are reset over the footing and the columns are anchored through them into the concrete below.
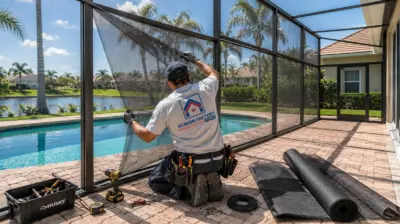
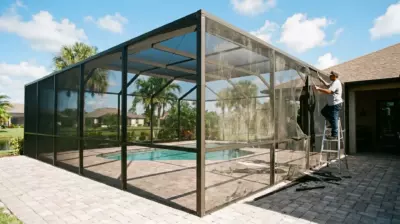
7. Build the Frame and Install the Screen
The installers set the columns and beams, connect the cage to the house, attach the gutter and downspouts, install the cables, and stretch the mesh panel by panel with spline. Stainless steel screws are the standard for structural joints in Florida.
8. Inspect and Hand Over
After the final inspection, the team checks the screen tension, the doors and closers, the gutter, the anchors, and the overall finish, and explains basic care and what the warranty covers.
Screen Mesh Choice Is Project Specific

The mesh is the part of the cage you see and touch every day, so it deserves a deliberate choice. Different panels of the same cage can use different mesh, and the right mix depends on insects, pets, view, and wind exposure.
- Regular screen 18/14 is the standard balance of visibility, airflow, and insect protection for walls and partitions.
- No-See-Um screen 20/20 has a finer weave for homes near water where tiny biting insects are common, with slightly less airflow.
- Super Screen 17/20 and 16/14 are heavier meshes for pool cages, large panels, and higher wind exposure.
- Pet screen 14/10 is the toughest option for lower panels and doors where dogs and cats are in contact with the screen.
- Charcoal sunscreen and Florida Glass add shade and privacy on selected panels; they are used in part of the cage, not around the entire perimeter.
Florida Glass reduces wind and rain on lower panels, but it is a screen material, not a sealed roof, and some water will pass through in hard or wind driven rain. For a side by side comparison of visibility, airflow, and strength, see our guide to screen mesh types for pool enclosures.
Daily Habits That Protect Your Screen Cage
- Keep doors closed when they are not in use and check that the closer pulls each door fully shut.
- Keep patio furniture, umbrellas, and grills away from the mesh so they cannot rub or puncture it.
- Teach children not to push or lean on the screen panels.
- Train pets to use the door; use pet screen on the lower panels if they press against the walls.
- Keep pool chemicals and pool cleaning poles from scraping the mesh.
- Clear leaves and pine needles from the roof and the gutter before they hold water.
- Direct sprinklers away from the screen walls to avoid mineral spots.
- Report a loose panel, a tear, or a sagging door early, while the repair is still small.
The Most Important Florida Rule: The Structure Comes First

Florida Specific Considerations
Salt Air and Coastal Homes
Salt settles on aluminum, screws, and mesh even several streets from the water. Rinse the cage with fresh water more often near the coast, and make sure structural screws are stainless steel. Ordinary steel screws in contact with aluminum corrode quickly and stain the frame.
Humidity, Mildew, and Pollen
Mildew grows on dirt and organic residue that sits on the mesh. A gentle rinse with a garden hose and mild soap keeps the screen clean. Never use a pressure washer: it can stretch the mesh and push it out of the spline.
Tropical Rain and the Gutter
Summer downpours test the gutter. Long roof lines usually need a larger gutter, and downspouts should carry water away from the cage, not under it. The gutter moves roof water; it does not solve drainage problems in the yard, which need their own solution.
Pets and Busy Doors
Doors and lower panels take the most wear. Kick plates protect the bottom of the door, and pet screen on the lower panels resists scratching. A pet door built into the screen door keeps the main door from being pushed open.
HOA Rules and Neighborhood Style
Many Florida communities set rules for frame color, height, and placement. Check the rules before the design is final, because changes after approval can delay the permit.
Common Problems and What They Mean

| Symptom | Safe homeowner check | Do not |
| Small tear in the mesh | Note its size and location; keep pets and furniture away from it. | Patch structural roof panels with tape or glue. |
| Mesh pulled out of the frame | Check whether the spline has lifted along one edge. | Force the mesh back with a screwdriver or knife. |
| Door drags or will not latch | Look for debris at the threshold and check the closer. | Remove or bend the door frame. |
| Water overflowing the gutter | Clear leaves from the gutter and downspout openings. | Climb onto the cage roof to clean it. |
| Rust stains near screws | Rinse the area and note which joints are affected. | Replace screws with ordinary steel fasteners. |
| Loose or slack cable | Look for a missing bracket or a bent anchor. | Tighten or cut cables yourself. |
| Frame creaks or moves more than before | Look for loose screws, cracked concrete, or damaged columns. | Ignore new movement after a storm. |
When to Call a Professional: Repair, Rescreen, or Replace
A 10-Minute Monthly Checklist
- Walk around the cage and look for tears, loose panels, or mesh pulling away from the frame.
- Open and close every door and confirm the closer and latch work.
- Clear leaves and debris from the base of the walls and around the doors.
- Check that the gutter and downspouts are clear.
- Look for rust stains, loose screws, or damaged brackets.
- Rinse visible dust, pollen, or salt from the lower panels.
- Trim branches that touch or hang over the cage.